SSO / SAML 2.0
Enterprise organizations can configure SAML 2.0 SSO for centralized authentication.
Overview
localskills.sh acts as a SAML Service Provider (SP). It supports any SAML 2.0–compliant identity provider, including Okta, Azure AD, Google Workspace, and OneLogin.
Configuring SSO requires the organization owner role. Configuration lives under Organization > SSO & SCIM.
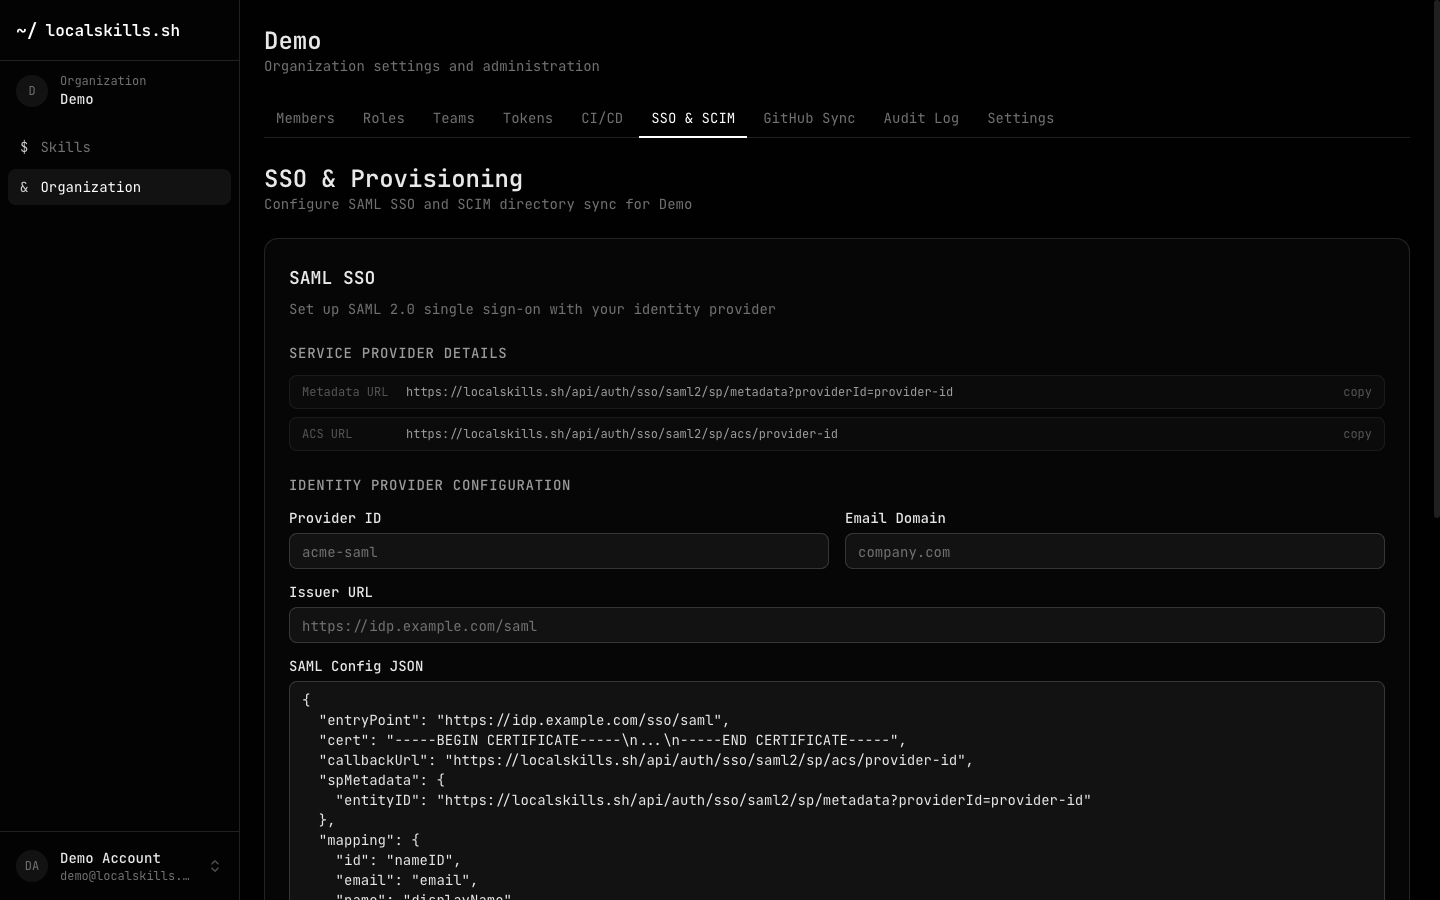
SP configuration
Provide the following values to your identity provider. Replace {providerId} with the provider ID from the SSO settings page.
Entity ID (also the SP metadata URL)
https://localskills.sh/api/auth/sso/saml2/sp/metadata?providerId={providerId}ACS URL
https://localskills.sh/api/auth/sso/saml2/sp/acs/{providerId}The ACS URL doubles as the SAML callback — if your identity provider asks for a separate callback or reply URL, use the ACS URL. The SSO settings page shows both values for your organization with copy buttons.
IdP setup
Configure an SSO provider from your organization's SSO & SCIM tab. Pick your identity provider — pre-built templates cover Okta, Cloudflare Access, and Authentik, with a generic template for any other SAML 2.0 IdP — and follow that provider's guide below to create the app on the IdP side. Each template presets the right attribute mapping and groups attribute for that provider.
Then connect it by pasting the IdP's metadata XML (recommended — the issuer, sign-in URL, and signing certificate are extracted automatically), or enter the SSO URL, issuer, and certificate manually. Finish with one or more email domains. The provider ID embedded in the SP URLs is assigned automatically and never changes.
For exotic setups (encrypted assertions, signed requests, custom attribute mapping) the JSON (advanced) tab still accepts the full Better Auth SAML configuration.
Okta
Copy your organization's Entity ID and ACS URL from the SSO settings page — they embed your provider ID, unlike the {providerId} placeholders shown above.
- In the Okta Admin Console, go to Applications → Applications → Create App Integration and pick SAML 2.0.
- Set Single sign-on URL to your ACS URL and Audience URI (SP Entity ID) to your Entity ID.
- Set Name ID format to EmailAddress and Application username to Email.
- Add attribute statements: email → user.email and displayName → user.displayName. For group → team mapping, add a group attribute statement named groups (filter: Matches regex .*).
- Finish the wizard and assign people or groups to the app.
Metadata XML: Open the app's Sign On tab, copy the Metadata URL, and open it in your browser to get the XML.
Cloudflare Access
Copy your organization's Entity ID and ACS URL from the SSO settings page — they embed your provider ID, unlike the {providerId} placeholders shown above.
- In the Cloudflare dashboard, go to Zero Trust → Access controls → Applications → Create new application and pick SaaS application.
- Enter a custom application name, then select SAML.
- Set Entity ID to your Entity ID and Assertion Consumer Service URL to your ACS URL. Set Name ID Format to Email.
- Save the application and add an Access policy for who may sign in.
- Access sends the email, name, and groups attributes automatically — no attribute statements needed.
Metadata XML: After saving, Cloudflare shows the SSO endpoint — fetch <SSO endpoint>/saml-metadata in your browser to get the XML. (Manual values: SSO endpoint, Access Entity ID, and Public key.)
Authentik
Copy your organization's Entity ID and ACS URL from the SSO settings page — they embed your provider ID, unlike the {providerId} placeholders shown above.
- In the authentik admin interface, go to Applications → Providers → Create and pick SAML Provider.
- Set ACS URL to your ACS URL and Audience to your Entity ID. Keep Service Provider Binding set to Post.
- Under Advanced protocol settings, keep the default property mappings (this template maps authentik's default attribute names) and select a signing certificate.
- Create an Application (Applications → Applications → Create) and set its Provider to the one you just made.
Metadata XML: On the provider's page, use the Metadata section to download or copy the metadata XML (also served at /application/saml/<application-slug>/metadata/).
Custom SAML
Copy your organization's Entity ID and ACS URL from the SSO settings page — they embed your provider ID, unlike the {providerId} placeholders shown above.
- Create a SAML 2.0 application in your identity provider.
- Set the assertion consumer service (ACS, sometimes called reply or callback URL) to your ACS URL and the SP entity ID (audience) to your Entity ID.
- Send the user's email in an attribute named email and their display name in displayName — or adjust the attribute mapping in the JSON (advanced) tab.
- For group → team mapping, send group membership in an attribute named groups.
Metadata XML: Most IdPs offer a metadata XML download or URL for the application. If yours doesn't, switch to Manual and enter the SSO URL, issuer, and signing certificate.
Email domains
Whitelist one or more email domains for SSO (e.g. example.com). Only users with matching email domains can sign in via SAML.
Each domain must be verified before sign-in routes to SSO: add the TXT record shown on the SSO settings page with the record name set to the claimed domain (host @ for a zone apex), then click Check Now. Unverified domains never trigger SSO auto-detection.
Multiple domains are supported; verify each one. A domain can only be verified by one organization at a time.
Sign-in flow
Users start SSO by entering an email address on the sign-in page. When the domain matches a configured provider with a verified domain, localskills.sh redirects them to your identity provider. First-time SSO users are provisioned into the organization automatically (audit events sso.user_created and sso.login_success).
Group → team mapping
Map identity-provider groups to localskills.sh teams from the SSO & SCIM tab. On every SSO login, the member's team membership is reconciled from the IdP's groups attribute: they are added to teams whose mapped group they hold and removed from mapped teams whose group is gone. Teams without a mapping are never touched.
Because teams carry roles, this is how IdP group membership translates into permissions — see /docs/teams and /docs/roles. Syncs are audited as sso.team_sync and mapping changes as sso.group_mappings_updated.